Case
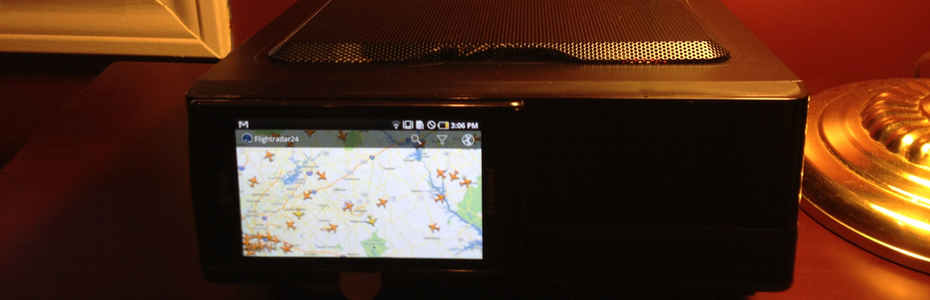
You are going to need some type of case to put your new motherboard in. Be sure to get one that is made for Mini ITX motherboards. Also, make sure the case comes with a power supply. Most power supplies will work fine since the Mini ITX motherboards use the same 24pin / 4pin connectors that full size motherboards use. Don’t agonize too much over the power supply size since the Mini ITX boards don’t require much power. Something between 60 and 80 watts will be fine unless you plan to expand the system down the road with some power hungry graphics cards. For our dedicated RTL-ADSB1 receiver, we just need the basics. Mini ITX boards come very small about the size of a large book to bigger models that offer greater expandability. Some of the smallest cases only have room for the motherboard and a hard disk. Some of the larger ones have more room for additional hard disks, CD ROM, and a add on graphics card. You really don’t need all this for the RTL-ADSB1, so I choose a case about the size of a small HF receiver. I choose to use the In Win IW-BQ656T from Newegg that goes for about $60 shipped. The case relatively small, but does have room for a slim DVD drive if you thought you needed it. It also comes with a built in 80 watt power supply. The other little odd thing about it, is that the power switch, external audio jacks, external usb ports, and status LEDS are mounted on a wired remote. The reasoning for this was that the system could be mounted behind a TV set and the user could still access all the controls and jacks. Outside of that, it is a pretty decent small sized case. This case is pictured below:
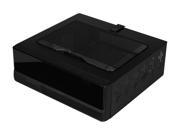
Another good case option would be the MI-008 for about the same price. This case is a bit larger and adds a larger power supply with more room for expansion.
MI-008 Tower Black P4 Chassis with 250W Itx Psu+sata Power Supply
My only complaint about the In Win IW-BQ656T is that the power supply was not as quite as would like for it to be. It actually isn’t that bad, I just prefer I could’t hear it. I can’t speak for the MI-008, since I have not used it. If it really bugs me, I will just install a Pico Power supply. Hindsight being 20/20 , I would have probably used one of the Habey cases that come with a fanless power supplies for only slightly more.
EMC-600B Super-Slim Mini-ITX Aluminum HTPC/NAS/Server PC Case with Fanless 12v DC Power Supply
Storage

Since the RTL-ADSB1 is intended to do one thing only, we really don’t need that much storage space. There are several options here. You can use a conventional laptop drive, which are reasonably cheap with lots of storage. Such as the Western Digital Blue 320 GB Mobile Hard Drive: 2.5 Inch, 5400 RPM, SATA II, 8 MB Cache, or a small 32GB Solid State Drive SanDisk Desktop Caching SSD – ReadyCache 32 GB SATA 3 Solid State Drive SDSSDRC-032G-G26
. If prefer the SSD because it’s quieter and 32GB is more than enough for this project. If you are not going to infall a DVD drive in the system, (no big reason to anyway) you will need a USB stick to install the operating system from if you do not already have a 8GB to 16GB stick. Kingston Digital DataTraveler 101 USB 2.0 Generation 2 – 16 GB Flash Drive DT101G2/16GBZET
Memory
You will also need at least one stick of 2GB DDR3 memory for the motherboard. Fortunately 2GB of DDR3 is pretty inexpensive. Kingston ValueRAM 2GB DDR3 1333MHz DIMM Desktop Memory (KVR1333D3S8N9/2G)
Optional Display
You will need a display , keyboard, and mouse to temporarily, while setting the system up. After the system is running to your satisfaction, you can then remove them a let the system run headless. If you want to have a full time display to see traffic in your area, you can leave a monitor connected up. Another option is to share your data with Flightradar24 you can use an iPhone, iPad, Android tablet, or Android Phone App to monitor your shared traffic. If you use the paid version, you can limit the the air traffic displayed to just live traffic. The only thing to be aware of is that if another Flightradar24 sharer is near you, the live traffic displayed may be a mix of yours and the other sharer. If you want to just see your traffic and also share you can use PlanePlotter running under Wine in Linux and still share with Flightradar24. If you have no interest in sharing, Virtual Radar Server can be used as a live display system and will run under Linux.
Costs
Ok, lets get a quick estimate of the approximate total of the cost of the RTL-ADSB1.
- Motherboard and processor – $80
- Case with power supply – $60
- Harddrive -$50
- Memory for the motherboard – $10
- RTL2832U Stick – $20
Total $220 for the basic receiver system. Not bad considering that just a basic USB ADS-B receiver stick will cost you that much, and thats not counting the computer needed. Again this total does not count the options you may decide to add. For example, you don’t really need a hard drive for this project. You can substitute a 32GB flash drive for the hard disk for around $20. Install Linux on the flash drive and setup the computers BIOS to always boot from the flash drive. You should then be able to install the other necessary software on the flash drive. This would save about $30 on the project bringing it down to around $190 dollars. Also, you may find these parts cheaper than my estimate or you may have some existing parts that you can reuse (I was able to build this system for around $150 after finding some of the parts on sale). The software to build this project is basically free with the exception of PlanePlotter if you choose to go that route. After reading through this article you and you decide that you may not up to building the computer system required for this project, you can buy a similar computer system prebuilt. These machines are a bit smaller, but run basically the same hardware. You still have to add a stick of memory and some storage, but you get everything else. You will wind up spending about $100 more for a prebuilt system. For example Zotac makes one ZOTAC AMD Dual-Core E-350 1.6 GHz/AMD M1/Wi-Fi/A&V&GbE/Mini PC Barebone System (ZBOXNANO-AD10-U)
Building the System
I would assume if you are reading this article that you have some experience with electronic gear. Even if you don’t these system is relatively easy to put together. Here are the basic steps:
- Be sure you have the AC cord disconnected from the case power supply before you start.
- Open up your case and install the back panel that came with your mother board by snapping it into place. Be sure to line up the back plate holes cutout to match the motherboard connectors.
- Mount the mother board in the case using the screws and standoffs provided with case. Just be sure you are not trapping any wires under the motherboard and the standoffs are only touching the areas of the motherboard that have holes for the screws. A misplaced standoff touching the bottom of the motherboard could damage the motherboard.
- Connect the 24pin and the 4pin power connectors from the case power supply to the matching sockets on the motherboard. They are keyed so you can’t get them oriented incorrectly unless you really try hard.
- Here is the most fiddly part. Connect the case wires for the Power LED, Hard drive LED, Power Button, and Reset Button to the front panel header on the motherboard. The case wires are usually labeled and the pins on the motherboard header are also labeled. However, since everything is so small, you may need to grab the motherboard manual which will show the front panel header in more detail. Orientation of the Power Switch and Rest Button connectors don’t really matter. However the Power LED and Hard Drive LED connectors do. When testing the setup, if you notice that your LEDs aren’t working, just switch the plugs orientation since they do require proper polarity.
- Connect the the connectors for the cases front panel Audio and USB jacks to the marked locations on the motherboard. Again, you may have to grab the motherboard manual to easier locate them. These connectors are also typically keyed, so you can’t get them wrong.
- Install the memory in to the slot(s) on the motherboard.
- If you are using a hard disk, go ahead and mount the disk in the computers case in the bracket the case should have for it. Run the SATA power connector from the power supply to the drive. Connect the SATA data cable (most motherboards usually include 1 or 2 of these) from the hard drive to one of the SATA connectors on the motherboard. Again the SATA power and SATA data connectors are keyed an will only go on one way.
- Connect a key board and display. Connect the power cable to the power supply and plug it in. Turn the computer on and after a few seconds you should see a the POST test go by on the screen. Since there is no operating system installed, you should see an error message telling you that. If you see these messages on the screen, you have successfully completed the build. If this doesn’t happen recheck your wiring.


Please edit first page of article, because introduced to the wrong way of thinking.
Raspberry is fully sufficient for adsb station.
I’m using 3 apps:
– dump1090 feeding data from RTL dongle and hosting at TCP/IP port
– adsbox feeding data from TCP/IP AVR format and hosting at TCP/IP port (BaseStation 30003)
– FR24 app everyone knows
Consume no more than 40% of the CPU.
In addition – the authors of dump1090 and adsbox working on fusing adsbox to dump1090
Look on my screen from Raspberry PI
http://i.imgur.com/bxv3Z.png
Best Regards
Radek